By default, when you create a rich text editor field, you can't add images until you create an images field to hold these images first.
When an images field is present, you can either select an image or upload a new one. This is because images in processwire are attached to each individual page, there is no centralized media storage (although there is a module for it). At first I thought this was weird, but when it comes to actually outputting data and grabbing images via your templates, this approach makes it very simple.
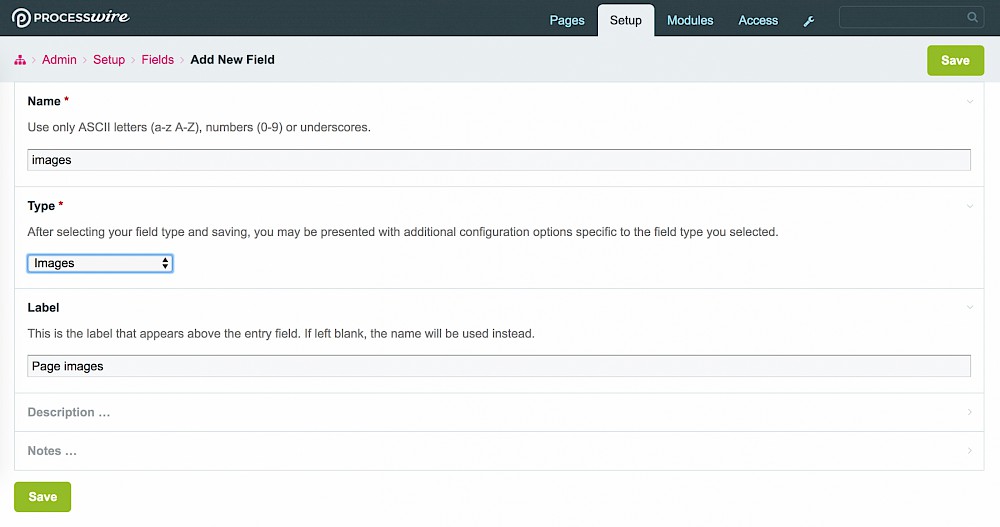
Add a new field of type 'images' called 'Page images' and save it. You can leave all options as default as this is outside the scope of this tutorial. See more about the images field type here.
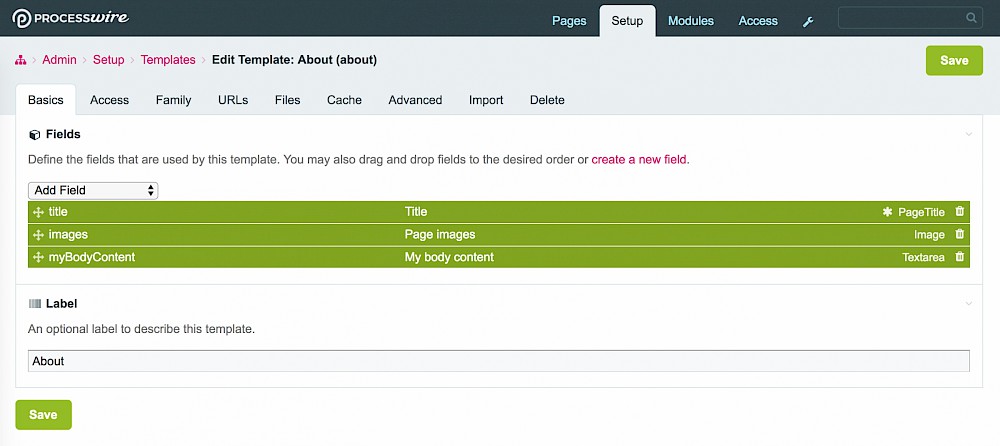
Create an 'about' template and add a rich text editor field and the images field we just created. If this field doesn't exist, learn how to create a rich text editor field here.
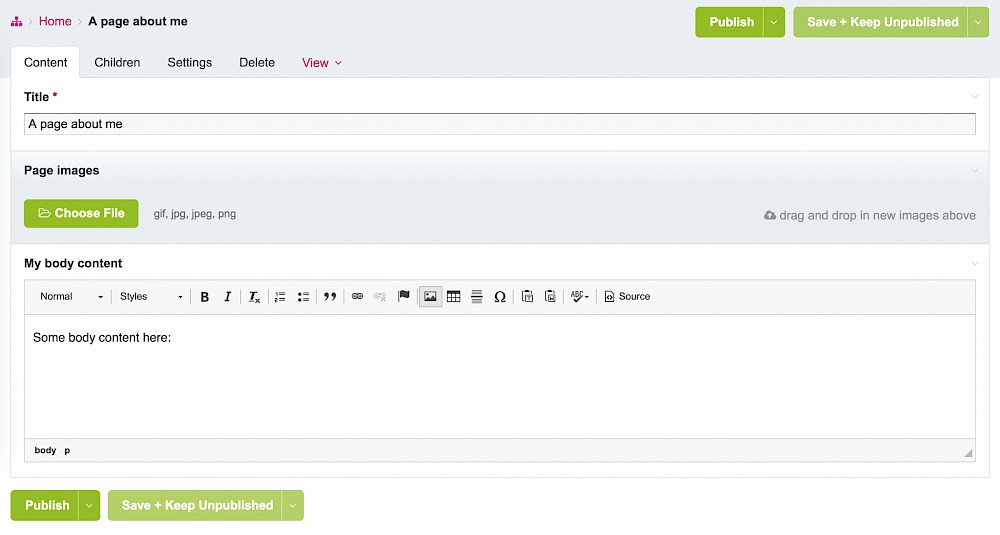
Create a new page as a child of 'Home' called 'A page about me' using the 'about' template. We now have a field to hold the page images.
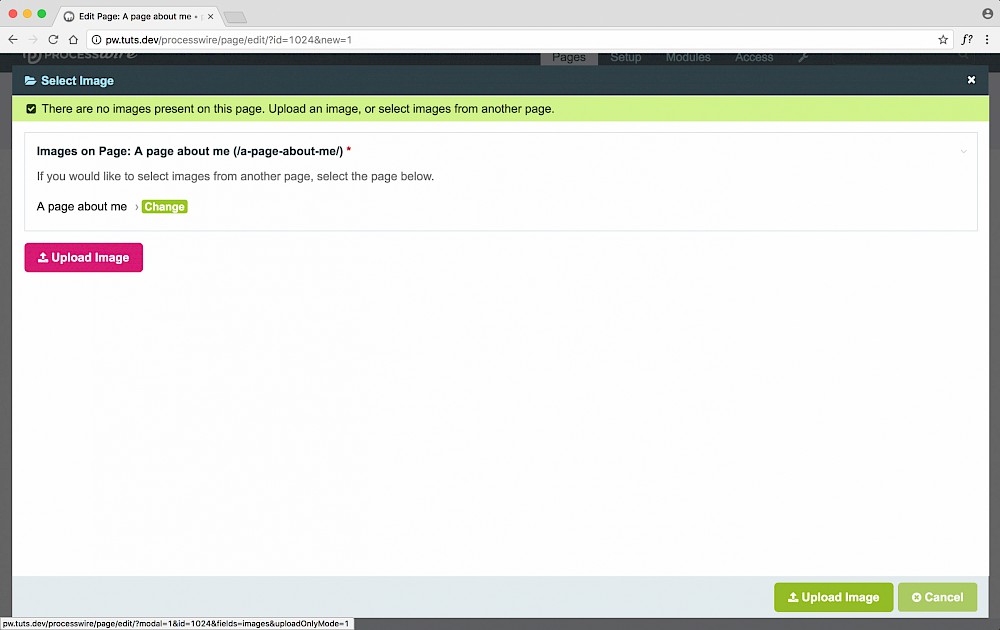
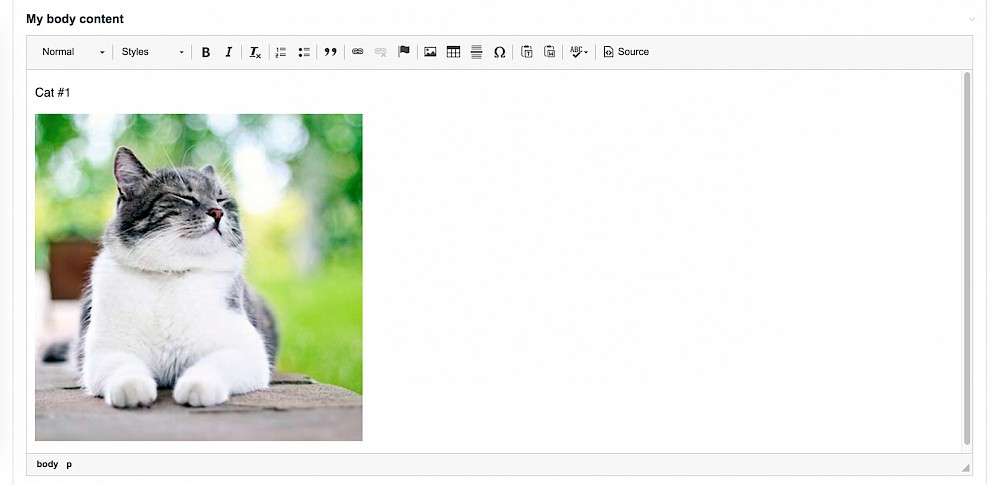
Now you can insert an image in the rich text editor. It's the icon that looks like a painting.
NOTE: Make sure your cursor is actually inside the editor before you insert an image as this is the location where the image will be inserted.

Clicking on that results in a modal window where you can either choose an existing image, or upload them.
Go ahead and upload a few, by default there's no limit set on this field for the number of images.
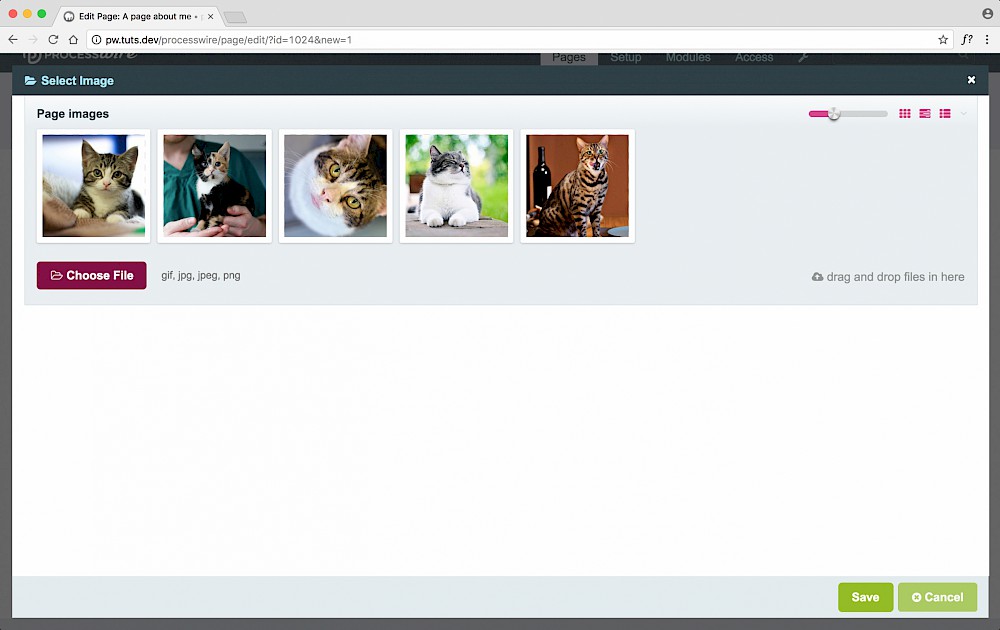
If you select one of the images, you can do some editing before you actually insert it into the rich text editor. This is outside the scope of this guide but play around with it.
After you're done, select 'Insert image'.
I'm not a great fan of putting images into a rich text editor though, it leaves little control of how your page can look. I mean, all you can is render the whole content of the rich text editor.
So let's add a few images, save the page, render it and set the time machine for 1990s internet!
<?php namespace ProcessWire; ?>

<!DOCTYPE html>
<html lang="en">
<head>
  <meta charset="UTF-8">
  <meta name="viewport" content="width=device-width, initial-scale=1.0">
  <meta http-equiv="X-UA-Compatible" content="ie=edge">
  <title><?php echo $page->title; ?></title>
</head>

<body class="<?php echo $page->template->name; ?>">

  <?php echo $page->myBodyContent; ?>

</body>

</html>
Fortunately, you don't have to go this route, processwire is very flexible which allows you to organize your content in much better ways, the best of the bunch in my opinion being the repeater matrix. This is part of the PRO fields paid package which includes some great modules for setting up your content in much more user friendly ways than this post described.
However, now you know how to use images in a rich text editor, so that's awesome.